Could anyone point me in the right direction for information on wiring a cheap 2 axis camera gimbal to my CC3D board? i.e Which pins to use, Also I am intending to fit a ublox GPS, how would I go about installing, wiring and setting that up? I haven’t chosen a receiver yet.
Thanks in advance
Do you already have the gimbal? Most gimbals today are brushless gimbals and have a gimbal controller that you just need to one of the cc3d outputs to control pitch. If you can give me some details of the gimbal you are using I can get a diagram drawn up for you, and details one hat you need to change on the openpilot app to configure cc3d for the gimbal
Thanks for getting back to me, yes I already have the gimbal its a Chinese cheapie, an aluminium frame brushless type to take a go-pro type camera ( I have a Turnigy SJ4000 type camera) I bought it with a Quanum Nova it works on that but I wouldn’t know which terminals to use on the CC3D it has a control board and I know which terminal on the gimbal board controls the vertical panning. If it would help I could supply photo’s?
Thanks again
Trevor
I’m 99% sure you will be able to control the pitch with cc3d, just a matter of figuring out the connectors, so if you can send some pics of the gimbal, with the gimbal controller board connectors I will hopefully be able to recognise what gimbal controller it is to say how to connect it.
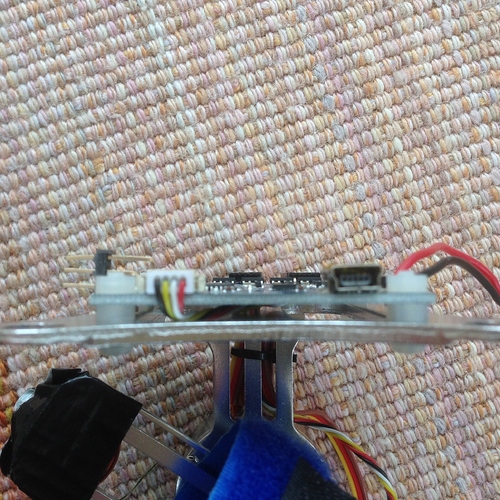
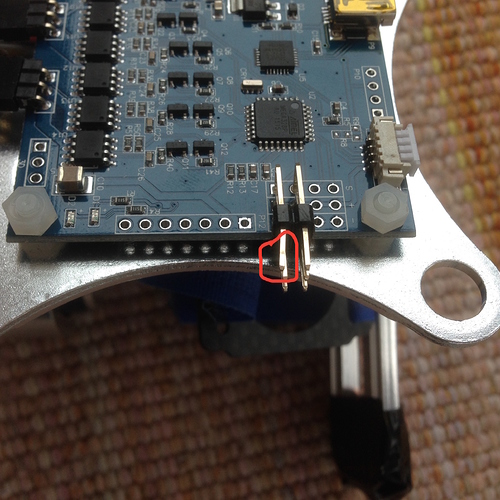
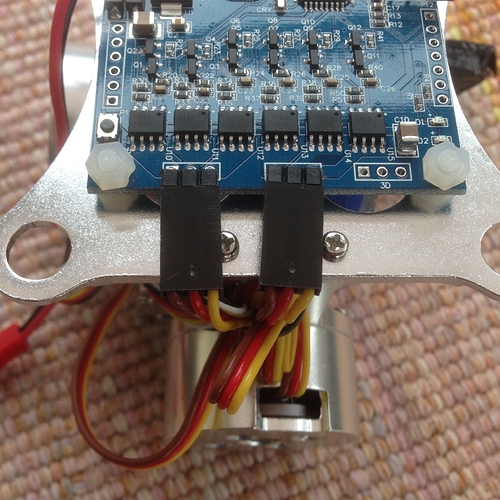
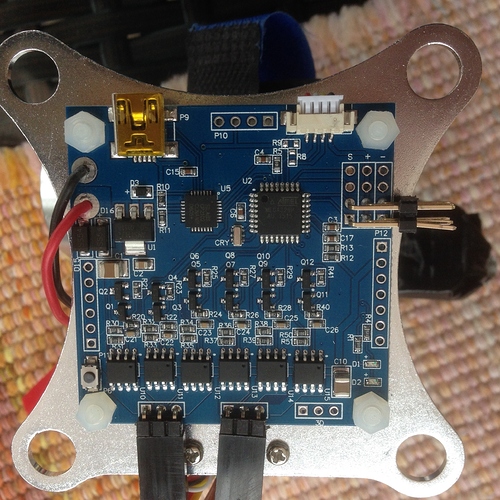
Thanks very much here are the photo’s of the gimbal and control board. I have had it working on a CX20 quadcopter and if you look at the image with pins I have ring in red the pin that controls the pitch. The trouble is I don’t know which pins on the CC3D provide the required voltage and which the single pin connects to for pitch signal?
Thankyou and regards
Trevor
Thanks for the photos, So teh first thing is that since you are using a brushless gimbal, the controller itself takes care of the stabilization, and you simply need to setup a pass-through on your CC3D from your receiver in order to manually adjust the pitch angle.
The easiest way to get this working would be to bypass cc3d entirely, so all you need to do is figure out which channel on your flight controller corresponds the the switch/knob you want to use for pitch control (most likely channel 6). Then you just need to take a wire from CH6 on your receiver and connect it directly to the pitch input pin on your gimbal controller (the red one you circled)
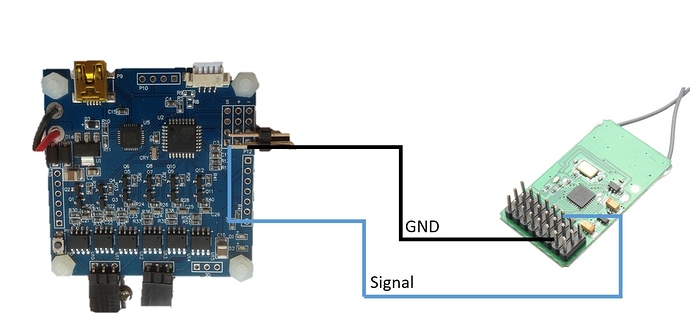
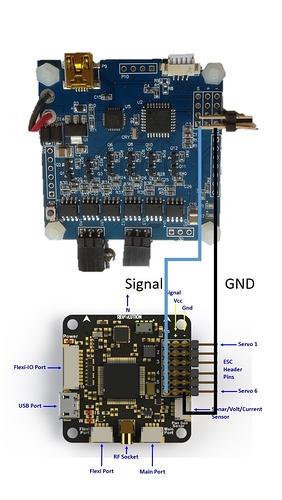
The only reason to pass the pitch control though your autopilot would be if it has something like a point of interest/ follow me feature where the flight controller will adjust the pitch depending on your altitude/distance to keep you in the frame. IE when you the drone is directly above you the gimbal will pitch down, and as it moves further away, it will pitch up. If this is the way you want to connect it, you will need to connect the gimbal signal to a spare output on your CC3D Board, in the example below I connected it to output 6.
You will then need to setup and configure the CC3D software to tell it that gimbal pitch control is read from ch 6 on your receiver, and will output on output 6 (the actual channels might vary depending on your R/C system). I cant give too much information on how to do this as I dont have it installed on my PC right now as I am currently traveling, but if you need help with this just let me know and I will be able to get write a better tutorial on Monday when I am back at work.
Thanks for your response Although I think I may have muddied the water a little with my explanation? What I needed to know was:- Which terminals on the CC3D to use to :- A) Power the gimbal + and -
B) Is there a terminal on the CC3D which supplies the signal for the pitch control? Or is this wired to the receiver?
Your reply has answered question B) thanks for that, just need the power supply terminals? question (A
The question about the GPS was a separate issue, which is:- Where to wire a GPS module to (and how) to the CC3D board. ie Which terminals will power the GPS and which communicate with the CC3D? I don’t need it to control the camera gimbal
Apologies for the mix up and sorry to bother you whilst you were away. Next week will be fine and thanks again
Best regards
Trevor
Just as an addendum I have come across some info online that says my CC3D board will not support GPS for the purpose I require such as RTL return to home, position hold and headless mode etc. Apparently for that I will need a REVO board I understand? In which case that’s now for another day, We’ll enjoy some flying time with this setup first
To power your gimbal you will need to connect it directly to your battery power (I am assuing you are using a 3S battery?) The power connectors are the two largre red ![]() and black
and black ![]() on the left of the gimbal controller board used in the images above. Usually I would just solder a connect the gimbal controller directly to the power distribution board. However if you are using a larger voltage battery that is beyond the voltage range of your gimbal controller board you might need to use a voltage regulator between the gimbal controller and your flight battery.
on the left of the gimbal controller board used in the images above. Usually I would just solder a connect the gimbal controller directly to the power distribution board. However if you are using a larger voltage battery that is beyond the voltage range of your gimbal controller board you might need to use a voltage regulator between the gimbal controller and your flight battery.
You dont need to provide any power along the pitch control, as it is powered from the main power of the gimbal controller. Just connect the PWM signal pin, and the ground to any spare output on your CC3D.
As I said it depends on which CC3D version you have to enable the RTH features as you will need to have a pressure sensor and compass sensor, but if you dont have these then I guess you dont have the CC3D revolution board, so you will not be able to use these features for now. Most of the cheaper CC3D boards you can buy off ebay dont include any pressure sensor as its not needed for miniquads.
That’s brilliant thankyou so much for your help this gives me some confidence, every day is a school day  kind regards
Can you do the same for me with the hubsan x4 pro 109s
tjsb@comcast.net to my email please
Tom
