If you wanted to have a convenient way to connect your PC/Android/IOS device to your radio telemetry gear with no wires then a Bluetooth bridge is a convenient way to do this. The basic idea is that telemetry is transmitted through the 3DR radio modules, but then on the ground it is relayed to a Bluetooth module which will transmit/receive the telemetry data wireless to your phone/PC/tablet.
There has been a recent kickstarter campaign for this device, which is a great idea, and looks like a great product but I think its abit on the steep side ($189 for full kit or $139 with no 3DR modules) So if you want to build one on the cheap read on!
Parts List
I estimate this to cost around £40 but will get the exact cost once complete.
- Bluetooth TTL Module - £10
- FTDI USB device to configure bluetooth module - £5
- 3DR 433mhz Radio Module - £10
- Voltage Regulator / UBEC - £4
- Battery (2s 500mah will be great) - £10
- Switch (to turn it off and on easily) (optional)
- Project Box to house everything (optional)
- USB charger (optional)
Configuring the bluetooth module
The bluetooth modules that we sell come with a defualt baud rate of 115200, since the 3DR radios run at a telemetry baud rate of 57600 we will need to change the bluetooth baud to match.
You will need to connect your Bluetooth module to your FTDI USB and connect to it via a serial monitor (I use the arduino IDE)
If you down have arduino you can download it here.
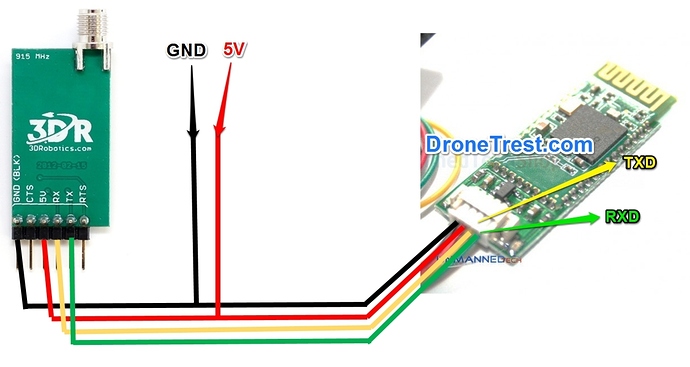
You will now need to connect your bluetooth module to the FTDI. Connect the 5V and ground between the Bluetooth module and FTDI. Now connect RX from FTDI to TX on Bluetooth, and TX from FTDI to RX on bluetooth.
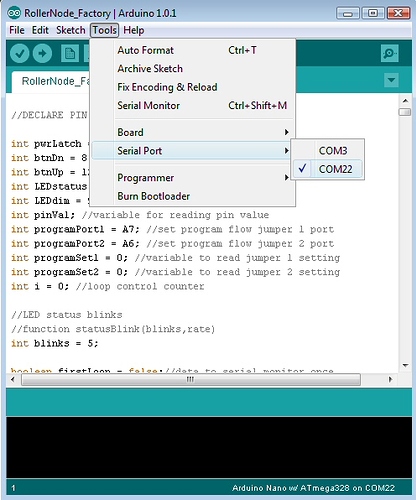
Now plug in the FTDI to your computers USB port. After a few seconds it should be installed. Now open arduino and on the Tools menu, go to Serial Port and select the corresponding COM port that matches the FTDI board (usualy the largest number).
Now press Ctrl+shift+M to open the serial monitor, you can also open it from the Tools menu. On the bottom corner of this window make sure you have selected the correct baud rate. I for the bluetooth module I am using its default is 115200.
Using AT commands you will need to set the correct baud rate on the Bluetooth module.
Enter the following into the serial monitor window.
AT
Should respond with OK if everything is connected properly.
Now to change the baud rate to 56700 type the following command
AT+BAUD7
You should get a response saying OK57600
That it, the module is now ready to use on the bluetooth telemetry bridge
Connecting it all together
You will just need to connect both the radio module and bluetooth module to your 5V power supply and ground. Then the RX from the bluetooth module will connect to the radio module TX, and TX on bluetooth will connect to radio RX.
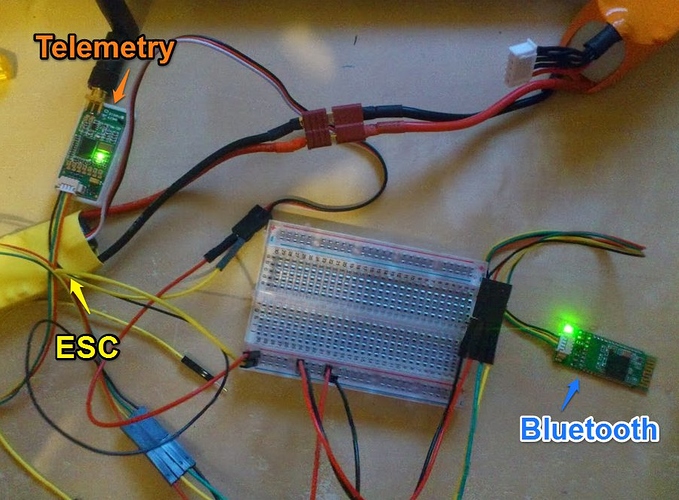
For now I just did a hack job using a ESC as a 5V supply, using a breadboard to share power between the Telemetry and BT module as shown below.
Connecting to the bluetooth Telemetry bridge
Now that everything is connected, you will just need to connect to the bluetooth module with your phone/tablet and you will begin to receive telemetry from your arducopter/arduplane. One thing that you should first check is that the two 3DR radio modules have been correctly setup and are both running at 57600 baud (default) and are both on teh same NetID.
Turn on your arducopter/arduplane and you should see the LED on the 3DR telemetry module light up as a solid green showing that they are both connected.
Now you will need to connect to the bluetooth module with your tablet/phone. The device name is CRIUS_BT with a pair code of 0000
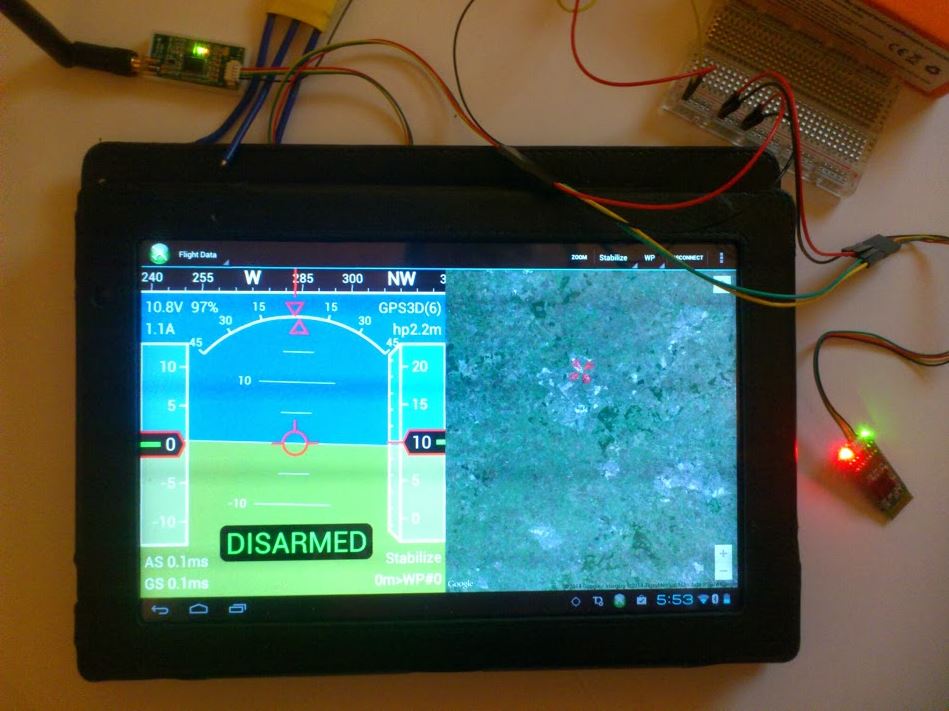
Now you just need to change the connection settings in andropilot/droidplanner to be bluetooth and everything should work!
Whats Next?
Now I just need to do some propper flight testing with this to see how it works. Assuming its still all ok I will work on makign things much neater and also look into adding a switch and possibly a USB charger or something, perhaps via a custom PCB.
If anyone has some comments or suggestions, or needs help please let me know!


