I just ordered a GPS module (TBS M10) but it doesn’t seem to have any instructions on how to connect it to my flight controller. Can you help?
We dont have a specific guide for that specific module, but connecting a GPS to your flight controller is fairly universal, no matter what GPS module you are using Since they are always connected to a spare UART port ony our flight controller.
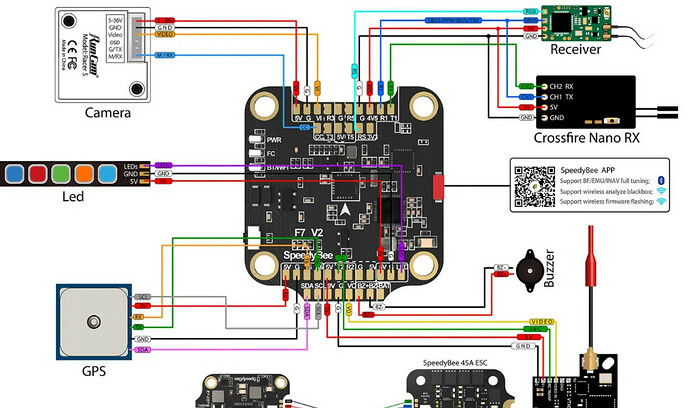
The diagram below can help to show you how to connect a GPS module.
So in your case the TBS M10 is just a compass module so only has the 4 connections (+power, ground, TX, RX). But in the diagram its a GPS+compass module, so has an extra two connectors for the compass (I2C SCA, I2C SCL).
Connecting the GPS Module
Hardware Installation
- Power and Ground: Connect the Power (usually 5V) and Ground to the corresponding pads on your flight controller.
- TX to RX Connection: Connect the TX (transmit) pin from your GPS module to a UART RX (receive) pad on your flight controller. Choose a higher-numbered RX pad (like RX6), as RX1 and RX2 are typically reserved for your receiver.
- RX to TX Connection: Connect the RX (receive) pin from your GPS module to a UART TX (transmit) pad on the same UART port as your RX connection (e.g., TX6 if you connected to RX6). Correct pairing of the TX and RX across the same UART port is crucial.
Software Configuration in Betaflight
Setting Up the Ports
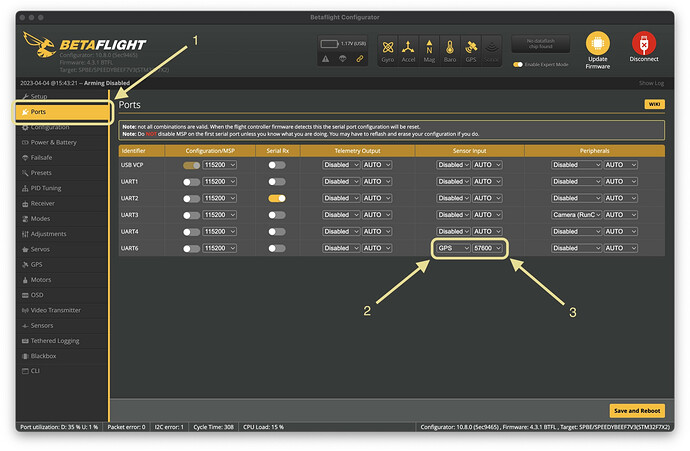
- Navigate to the Ports tab by clicking Ports on the left-hand sidebar to view the flight controller port options.
- In the Sensor Input Field for the UART port to which your GPS is connected, select GPS.
- Set the correct baud rate for the GPS; most GPS modules operate at 57600 by default.
Enabling GPS in the Configuration Tab
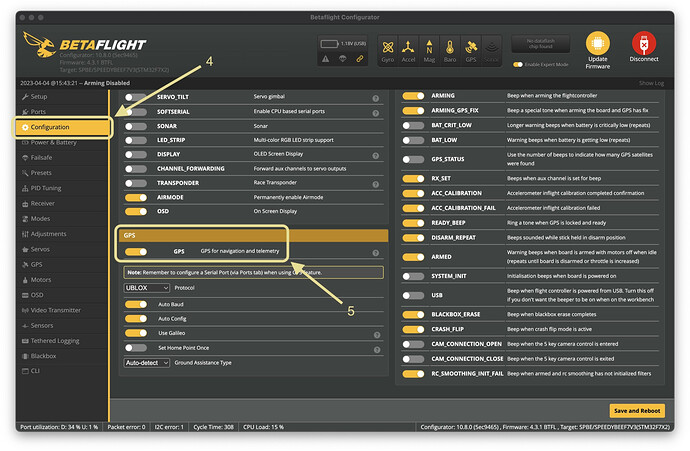
- Click Configuration in the left-hand sidebar to access general configuration settings.
- Scroll to the GPS section at the bottom of the page and toggle the GPS switch to on.
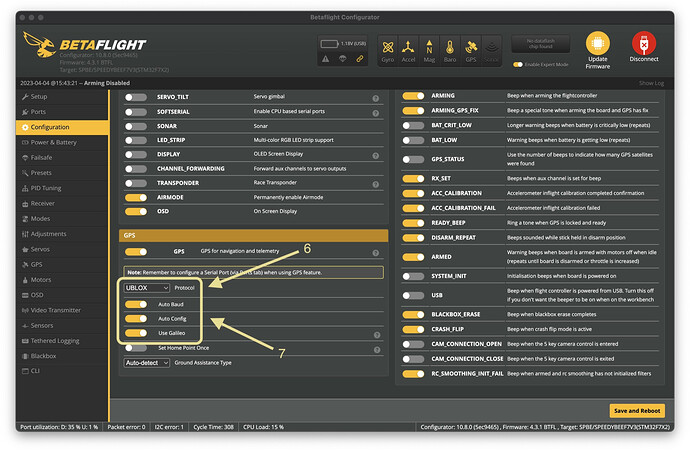
- Protocol and Auto Configuration: Set the correct protocol for the GPS and ensure auto-configuration is enabled for optimal performance.
- Finalize Settings: Save your new settings to ensure all your configurations take effect and the system properly recognizes the GPS module.
The process is similar for Inav
Hope that helps!


