Remzibi OSD setup video
I came across this great video showing you how to easily configure and setup your remizibi OSD board. The guide over at http://www.happykillmore.com/Software/faq.asp has not been updated for a very long time so thanks to diegobobcat for posting a helpful video!
Remzibi OSD Modes and Status LED
The Remzibi OSD module has two modes and is indicated via the Blue LED:
Normal Mode - This is the default mode when to turn on the OSD. In this mode the Blue LED will flash. In this mode there are two video modes that you will need to set depending on your camera (PAL and NTSC)
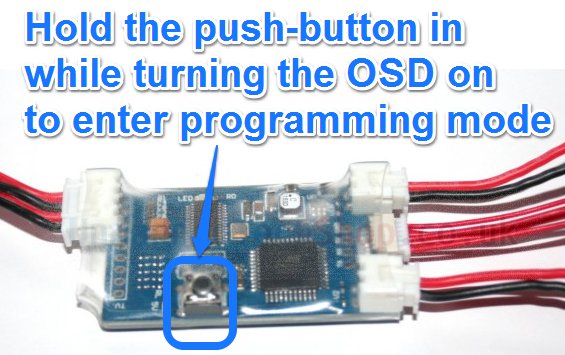
Programming Mode - This mode is used to change the settings on the OSD board. To enter this mode simply hold the pushbutton in while pluggin in the power to the Remzibi OSD module (or plugging in the USB dongle to your PC).
Connecting to your Remzibi OSD Board
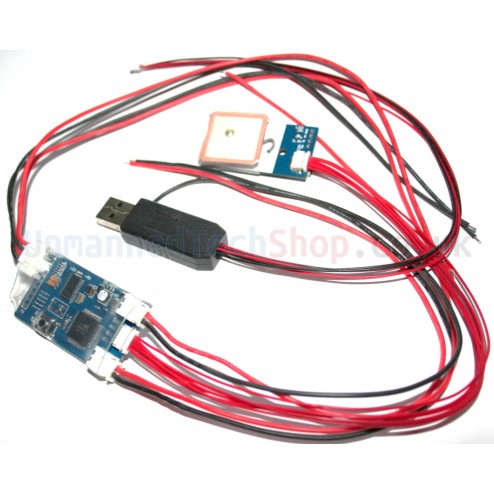
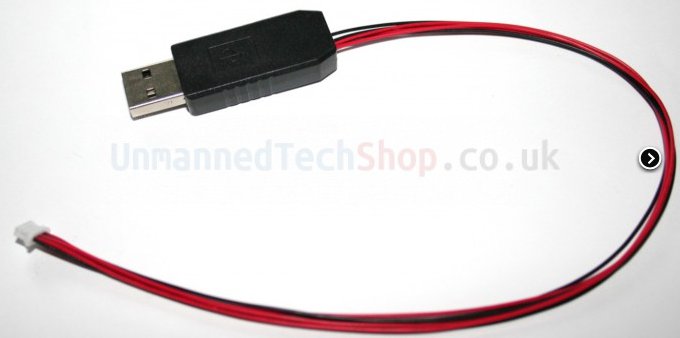
Connect the included USB dongle to your remzibi OSD board.
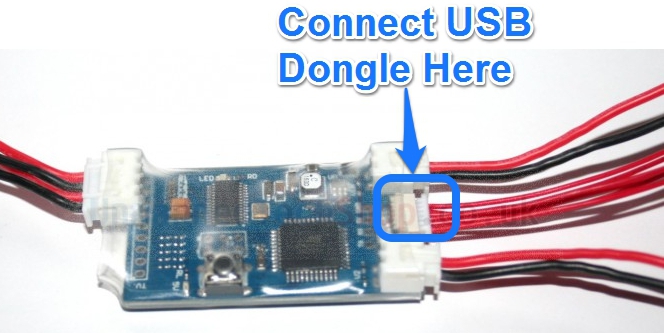
The USB dongle connects to the same place the GPS module is connected to, so you will need to disconnect the GPS first.
Now you will need to plug the USB dongle into your windows PC and the drivers should be loaded automatically after a few seconds. Once connected you should see a solid red light, and a flashing blue light on your Remzibi OSD to indicate the OSD is in normal mode. And if you enter programming mode (see how to above) the Blue LED will be solid.
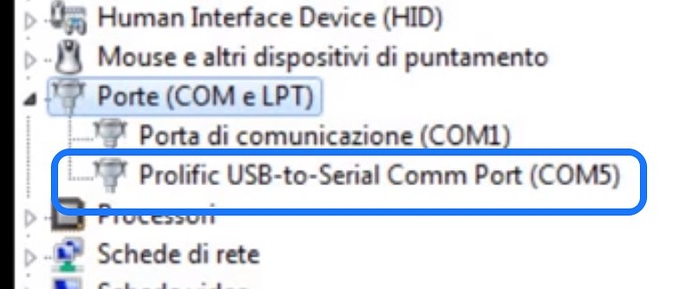
To check that the drivers are correcty installed open the device managed and you should see a new COM port device as shown below (Prolific USB-to-Serial Comm Port). If your PC does not install the driver you can download it here
Now you will need to open the Remzibi OSD tool program which can be downloaded here. Once installed open the program (with your OSD plugged in and in program mode). A serial fucntions window should open (if not select it from the top toolbar)
In the Serial Functions window, select the correct COM port, and click Connect. In the Serial Cable Setup tab, select “FTDI – diydrones.com” from the Cable Selection dropdown menu. . Click Start Test, and check that the Status reads “Passed […]” If the test fails, make sure you have selected the correct COM Port, make sure that your Remzibi board is in programming mode (solid blue LED), and check your cabling.
You can now change the settings via the config tool as you desire, like changing locations of OSD display etc… For more information please visit the official FAQ page.
Updating Remzibi OSD Firmware
Your remzibi OSD board should already come pre loaded with firmware so you will probably not need to do this. But sometimes things can go wrong and you end up bricking your OSD board (black screen) so an update to the firmware might be needed.
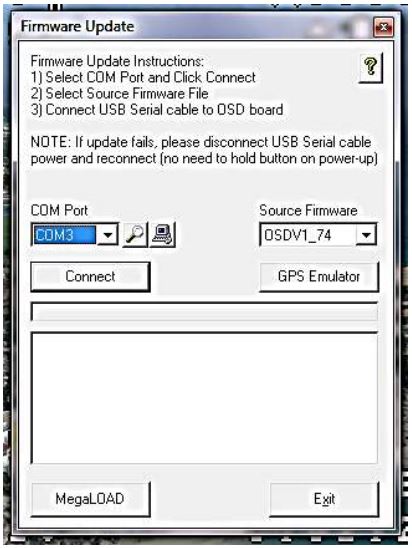
As mentioned above, connect your OSD board to your PC in programming mode (solid blue LED). In the Remzibi OSD config tool, select Firmware Update and the Firmware Update window will open.
- In the Firmware Update window, choose the correct COM port and source
firmware you would like to upload. If you do not see the firmware you
would like to upload in the dropdown menu, you can search for it in
the next window. - Click on MegaLOAD
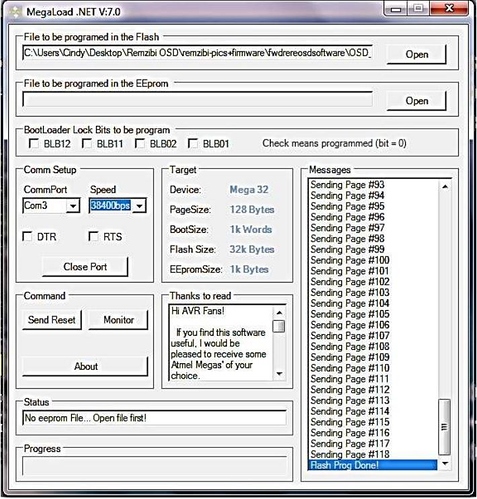
- In the MegaLOAD window, you may see a file under File to be
programed in the Flash. You can either upload this firmware, or you
can search for a different firmware by clicking Open and searching
for the File to be programmed in the Flash. - Select the COM port
- Set the Speed to 38400bps
- Press the reset button on the Remzibi’s OSD to reset the board.
The firmware will automatically be uploaded. If the upload fails or
does not begin immediately, try resetting the board again.
When the firmware is being uploaded, you will see pages being sent in
the Messages box, and once it is finished, it will read Flash Prog done!

